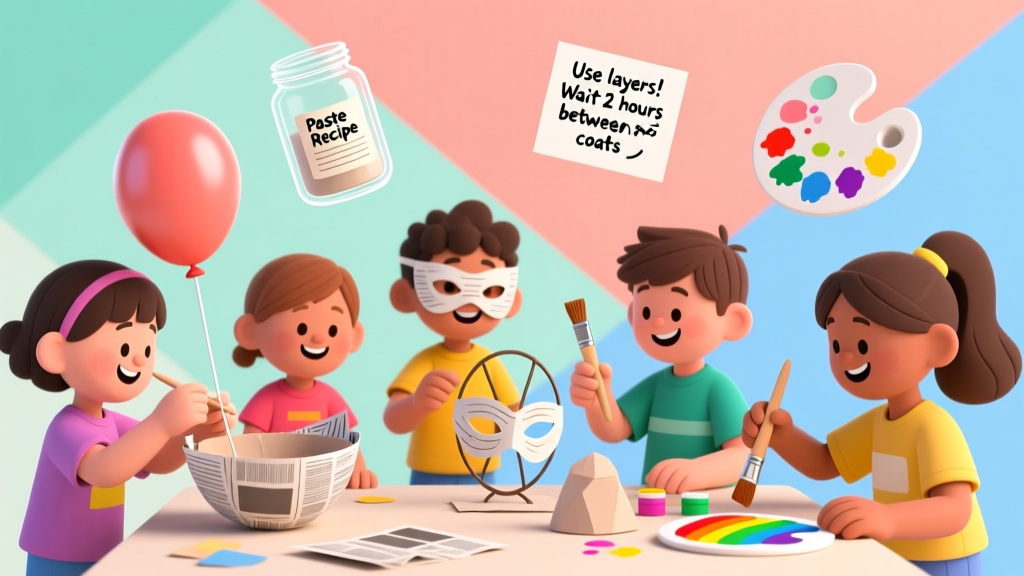
Paper Mache Projects: Step-by-Step Kids Guide (2026)
The Perfect Paste Recipe
Flour paste (best for kids):
- 1 part all-purpose flour
- 2 parts water
- Mix until smooth (like pancake batter consistency)
- Add a pinch of salt to prevent mold
- Use within 2 days (refrigerate overnight)
Glue paste (stronger): Mix white school glue with water 1:1. Stronger bond but more expensive for large projects.
Basic Technique
- Tear newspaper into 1-inch strips (tearing creates better edges than cutting)
- Dip each strip in paste, running between fingers to remove excess
- Apply strips to your form, overlapping and smoothing
- Layer 3-4 layers for basic projects, 6-8 for sturdy pieces
- Alternate strip direction with each layer (horizontal, then vertical)
- Dry completely between every 2 layers (24 hours)
- Finish with a final smooth layer of white paper for painting
10 Projects
1. Balloon Bowl (Ages 4+)
Inflate a balloon. Apply strips to the bottom half only. After drying, pop the balloon. You have a bowl! Paint the inside and outside.
2. Pinata (Ages 6+)
Cover a balloon completely with 6+ layers. Cut an opening at the top. Fill with candy. Decorate with tissue paper fringe.
3. Mask (Ages 7+)
Use a plastic mask as a form, or build on a balloon cut in half. Add features with crumpled paper and tape before applying strips.
4. Volcano (Ages 5+)
Build a cone from crumpled newspaper and tape around a bottle. Cover with paper mache. Paint and add baking soda + vinegar for eruption.
5. Globe (Ages 8+)
Cover a ball with strips. Paint oceans and continents. Add a wire stand. Great geography + art crossover project.
6. Animal Head Mount (Ages 9+)
Build an animal head form from crumpled paper and cardboard. Add ears, nose, horns with smaller shapes. Cover with strips. Paint realistically.
7. Treasure Chest (Ages 7+)
Cover a small box with paper mache. Add a lid. Paint to look like wood with gold details. Add a clasp. Store treasures inside.
8. Puppet Head (Ages 6+)
Cover a small balloon for the head. After drying, add features with more paper mache. Paint a character face. Attach to a stick or sock.
9. Lantern (Ages 8+)
Cover a balloon with strips, leaving an opening at top and bottom. After drying, pop balloon. Place a battery candle inside. Decorate with cut-out patterns.
10. Dinosaur Sculpture (Ages 10+)
Build a wire armature for the skeleton. Wrap with crumpled paper for muscle forms. Cover with paper mache. Add texture with additional strips. Paint with realistic colors.
Painting and Finishing
- Prime first: Paint a white base coat (gesso or white acrylic)
- Acrylic paints: Best for paper mache — they adhere well and are water-resistant when dry
- Seal: Apply mod podge or clear acrylic spray for durability and shine
- Detail work: Use small brushes and paint pens for fine details
Common Problems and Fixes
Mold growing on project
You used too much paste and didn't dry between layers. Add salt to paste. Ensure complete drying. If mold appears, spray with vinegar and let dry in sunlight.
Project is too heavy
You used too many layers or too much paste. For most projects, 3-4 layers is sufficient. Strip paste before applying.
Surface is bumpy
Sand lightly with fine sandpaper after final drying. Apply a thin layer of joint compound for an ultra-smooth finish.
More Articles
 Where to Buy Jovy Kids Makeup (2026)
 Seasonal Wreath Crafts Kids Can Make Easily
 Outdoor Educational Toys: Science-Backed Nature Learning
 Best Outdoor Play Equipment for First-Time Parents
 Kid-Friendly Puppet Making: Easy, Safe & Educational
 Board Game for Kids: No-Plastic, No-Printer (2026)
 How to Draw a Castle for Kids (2026)
 Recycled Crafts: Easy Ideas for Kids
 18 DIY Bookmarks for Kids Using Recycled Materials
 How to Draw Christmas for Kids: Stress-Free Guide