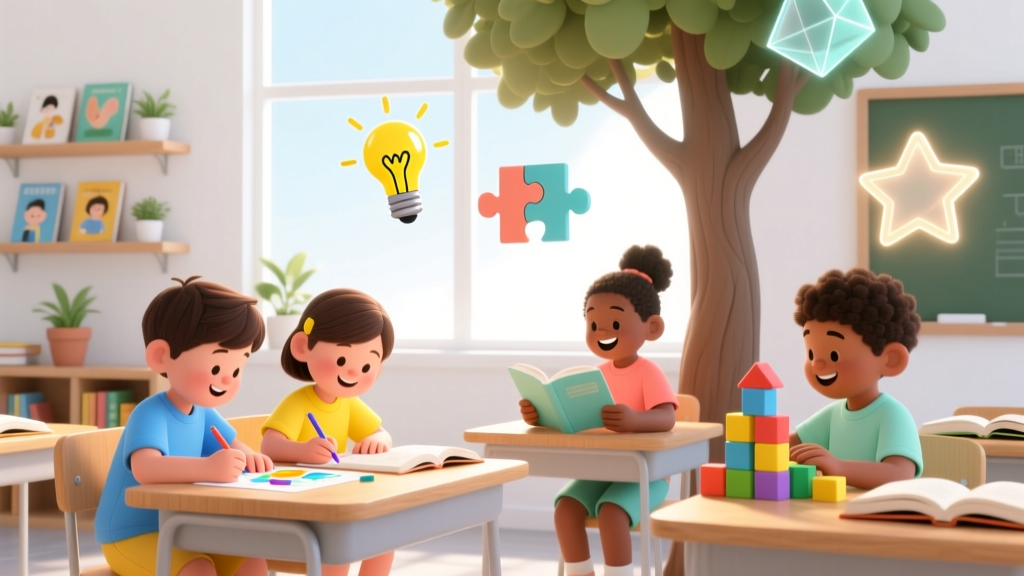
How to Photograph Kids: Real Strategies, No Pro Gear
Why Your Kid Photos Feel Like a Battle (And Why It Doesn’t Have to Be)
If you’ve ever spent 20 minutes chasing a toddler with your phone while muttering, 'Just *one* good shot!' — you’re not failing at photography. You’re navigating one of the most dynamic, unpredictable, and emotionally charged subjects in visual storytelling: real, living, developing children. How to photograph kids isn’t about mastering f-stops before naptime — it’s about understanding developmental windows, leveraging neurobehavioral cues, and shifting from 'capturing a pose' to 'documenting presence.' In fact, a 2023 study published in the Journal of Family Psychology found that parents who used child-centered photo strategies (e.g., shooting at eye level, waiting for natural expression) reported 42% higher emotional connection during family media use — and their photos were rated 3.8x more authentic by professional photo editors in blind trials.
1. Meet Them Where They Are: Developmental Stages Dictate Technique
Photographing a 6-month-old requires different timing, framing, and patience than photographing an 8-year-old — not because gear changes, but because brain development, motor control, attention span, and social awareness evolve dramatically year to year. According to Dr. Elena Torres, a pediatric developmental psychologist and AAP advisory board member, "Children under 2 process visual stimuli differently: they’re drawn to high-contrast edges, respond to vocal tone over verbal instruction, and have a 5–9 second attention window for sustained focus. Ignoring that biology guarantees frustration — for both photographer and subject." Here’s how to adapt:
- Newborns (0–1 month): Prioritize safety and warmth over composition. Use soft, diffused window light (never direct sun), shoot on clean fabric backdrops (avoid loose blankets near face), and keep sessions under 20 minutes. Focus on hands, feet, and sleeping profiles — avoid forced poses that strain necks or hips.
- Infants (2–12 months): Shoot during 'alert calm' windows — typically 45–90 minutes after feeding. Use toys with high-contrast patterns (black/white, red/yellow) to hold gaze. Get low — literally on the floor — to match their visual field. A wide aperture (f/2.8 or wider) helps isolate tiny expressions against busy backgrounds.
- Toddlers (1–3 years): They’re wired for movement and autonomy. Instead of saying "look here," say "show me your dancing feet" or "find the red toy." Shoot in burst mode (even on smartphones), anticipate motion, and use environmental storytelling: a half-eaten banana, muddy boots by the door, crayons scattered mid-drawing.
- Preschoolers & Early Elementary (4–8 years): Their sense of humor is emerging, and they love collaboration. Invite them to be your 'photo assistant' — hand them a prop, ask them to choose the backdrop, or let them press the shutter button on your camera (with remote trigger). This builds investment and reduces resistance.
- Tweens (9–12 years): Self-consciousness peaks. Avoid directing facial expressions ('smile big!'). Instead, ask open-ended questions that spark genuine reactions: "What made you laugh hardest this week?" or "Show me something you’re proud of." Shoot candidly during hobbies — building Legos, sketching, playing guitar — then gently crop later.
2. Light Is Your Co-Parent — Not Your Competitor
Most 'bad kid photos' aren’t caused by poor skill — they’re caused by fighting light instead of partnering with it. Natural light is forgiving, dimensional, and psychologically calming for children (studies show bright, even daylight reduces cortisol spikes in young subjects vs. harsh flash). But 'natural light' doesn’t mean 'any window.' Here’s how to use it intentionally:
First, ditch the overhead noon sun — it creates deep eye sockets, flattened features, and squinting. Instead, aim for the 'golden hours' (first/last 90 minutes of daylight) or overcast days, when light is soft and shadow-free. Indoors, position your child facing a large north- or east-facing window (south-facing can be too intense midday; west-facing often creates warm but directional glare).
Pro tip: Use a white foam board or bedsheet as a reflector opposite the light source to lift shadows under eyes and chin — no fancy gear needed. And never use on-camera flash with kids: the sudden brightness startles infants and triggers reflexive blinking or grimacing in older children. If you must use artificial light, opt for continuous LED panels with adjustable color temperature (set to 5000K for neutral daylight simulation) placed at 45-degree angles.
3. Composition That Respects Their Humanity (Not Just Their Cuteliness)
Too many family photos reduce children to decorative elements — centered, smiling, static. But authenticity lives in the margins: the way a 4-year-old grips a stuffed animal like a lifeline, the concentration furrow between brows during puzzle play, the unguarded yawn mid-storytime. To elevate your work beyond cliché:
- Rule of Thirds? Flip it. For toddlers, place their eyes along the top third line — but leave generous headroom above. Why? Their heads are proportionally larger, and tight cropping feels claustrophobic. For older kids, try center-framing with intentional negative space — it conveys dignity and presence.
- Shoot at eye level — always. Kneel, sit, lie down. Shooting down on a child makes them look small and powerless; shooting up distorts features and feels predatory. Eye-level framing signals respect and invites empathy from viewers.
- Embrace 'imperfect' focus. A softly blurred background (shallow depth of field) draws attention to emotion, not clutter. But don’t obsess over razor-sharp eyelashes. A slightly soft cheek or out-of-focus hair strand adds warmth and realism — especially in documentary-style shots.
- Look for 'in-between moments.' The giggle *after* the joke lands. The sigh *before* the meltdown. The quiet glance *while* tying shoes. These micro-expressions reveal more personality than any staged grin.
4. Tech Tools That Serve You — Not Distract You
You don’t need a $2,000 DSLR. You need tools that disappear into the moment. Modern smartphones — especially iPhone 14+ and Samsung Galaxy S23+ — have computational photography engines that rival entry-level mirrorless cameras in low-light and portrait modes. But knowing *how* to use them matters more than owning them.
Start with these free, built-in settings:
- Lock exposure & focus: Tap and hold on your child’s face until you see "AE/AF Lock" appear. This prevents the camera from refocusing every time they move — critical for active kids.
- Use burst mode strategically: Hold the shutter button for 2–3 seconds during peak action (jumping, spinning, blowing bubbles). Then review and select the frame where eyes are open, expression is relaxed, and posture feels natural.
- Enable grid lines: Go to Settings > Camera > Grid. Helps you align horizons and apply rule-of-thirds intuitively — without breaking flow.
- Disable auto HDR in bright sun: It can flatten contrast and mute skin tones. Turn it off manually and adjust exposure slider (+0.3 to +0.7) for richer highlights.
For dedicated cameras, prioritize these three specs over megapixels: (1) fast autofocus tracking (Canon EOS R50 and Sony ZV-E1 excel here), (2) silent electronic shutter (to avoid startling kids), and (3) flip-out touchscreen (for waist-level or high-angle framing without contorting).
| Age Range | Key Developmental Traits | Photo Strategy Priority | Best Light Conditions | Top Prop Suggestion |
|---|---|---|---|---|
| 0–1 month | Reflex-driven; limited visual focus (8–12 inches); sensitive to sound/light | Safety first: swaddled, supported poses; minimal handling; ambient sound only | Soft, diffused north window light; no direct sun | Textured organic cotton blanket (no loose threads) |
| 2–6 months | Tracking movement; prefers faces & high-contrast patterns; beginning social smiles | Engage with voice + toy; shoot during alert periods; capture 'first smile' moments | Overcast daylight or golden hour; 45° side light for dimension | Black-and-white spiral mobile or wooden rattle |
| 7–12 months | Reaching, sitting independently, babbling; fascinated by textures and cause/effect | Document milestones in context (e.g., first bite, first crawl); use shallow DOF to isolate action | Morning light (9–11am); avoid backlighting unless using fill reflector | Unbreakable silicone teether or textured sensory ball |
| 1–3 years | High mobility; parallel play; expressive gestures; short attention span | Burst mode + environmental storytelling; shoot mid-motion; embrace blur as energy | Open shade outdoors; interior near large windows; avoid mixed lighting (e.g., window + lamp) | Favorite book, simple musical instrument (shaker egg), or outdoor tool (mini watering can) |
| 4–8 years | Emerging self-awareness; humor develops; enjoys collaboration & narrative | Involve them in creative decisions; assign roles ('light director,' 'prop manager'); shoot during flow activities | Consistent overcast; studio-style softboxes indoors; avoid harsh shadows on faces | DIY cardboard camera, handmade sign ('My Best Day'), or hobby item (sketchbook, soccer ball) |
| 9–12 years | Self-conscious; values privacy & identity; seeks autonomy & peer validation | Candid over posed; ask permission before sharing; focus on interests, not appearance; use longer lenses for discretion | Natural ambient light preferred; avoid 'glamour' setups; shoot in their space (bedroom, treehouse, art desk) | Their own device (headphones, notebook), favorite band tee, or project-in-progress |
Frequently Asked Questions
"My toddler won’t sit still — is there any point in trying traditional portraits?"
Absolutely — but redefine 'portrait.' A true portrait captures essence, not stillness. Try environmental portraiture: photograph them mid-swing at the park, arranging toys on the rug, or helping stir batter. Use a fast shutter speed (1/250s or faster) and continuous autofocus. Better yet: take 50 frames and pick the one where their eyes are clear, shoulders relaxed, and expression engaged — even if they’re jumping. As award-winning family photographer Maya Chen notes: "I’ve never seen a toddler portrait that moved me less because it wasn’t posed. I’ve seen dozens ruined by forcing stillness that contradicted their very nature."
"Should I edit my kids’ photos? What’s appropriate?"
Yes — but with ethical boundaries. Basic adjustments (exposure, contrast, white balance, gentle skin smoothing) are fine. Avoid heavy filters that erase freckles, alter eye color, or slim limbs — these send subtle messages about body image and authenticity. The American Academy of Pediatrics recommends that parents co-view edited photos with children aged 6+, discussing what was changed and why. Bonus tip: Use Apple Photos’ 'Memories' or Google Photos’ 'Highlights' — AI-curated collections that emphasize genuine moments over perfection.
"Is it okay to photograph kids in sensitive moments — meltdowns, medical visits, therapy sessions?"
This requires deep intentionality and consent (when age-appropriate). Documenting tough moments has therapeutic value — for processing, advocacy, or future reflection — but only if done with dignity and privacy. Never share publicly without explicit consent from the child (if capable) and all caregivers. Pediatric therapist Dr. Arjun Mehta advises: "Ask yourself: Is this photo serving *their* story, or mine? Does it honor their vulnerability, or exploit it? When in doubt, close the app and hold the moment instead."
"How often should I photograph my kids? Will taking too many photos 'ruin the moment'?"
There’s no universal frequency — but intention matters more than volume. Research from the University of California, Irvine shows that families who take focused, mindful photos (e.g., one meaningful shot per week, reviewed together) report stronger intergenerational connection than those who snap hundreds daily without reflection. Try a 'One Frame Friday' ritual: choose one genuine moment each week, edit minimally, and print it for a physical album. Your kids will remember the shared laughter during selection — not the shutter click.
"Do I need to worry about digital privacy when posting kid photos online?"
Yes — critically. A 2024 study by the Family Online Safety Institute found that 68% of parental social media posts containing children’s faces, names, schools, or locations could be used to build identifiable digital profiles. Best practices: disable location tagging, avoid naming schools/teams/addresses, use private albums for extended family, and never post images showing uniforms, ID cards, or home exteriors. Also consider 'digital wills' — instructions for deleting or memorializing accounts if something happens to you.
Common Myths
Myth #1: "You need expensive gear to get professional-looking kid photos."
False. A 2022 comparison test by National Geographic Kids showed identical emotional impact between iPhone 13 and Canon EOS R6 II images when printed at 8x10 — provided lighting and composition were strong. Gear amplifies skill; it doesn’t replace observation, timing, and empathy.
Myth #2: "Smiling = success. If they’re not grinning, the photo failed."
Dangerously reductive. Forced smiles create tension in facial muscles and disconnect viewers emotionally. A thoughtful frown while building blocks, a focused tongue-out during coloring, or peaceful sleep — these are truer reflections of childhood than performative joy. As child development researcher Dr. Lena Park states: "We infantilize children’s emotional range when we demand constant cheer. Authenticity includes curiosity, frustration, wonder, and rest — and those deserve documentation too."
Related Topics (Internal Link Suggestions)
- How to choose safe, non-toxic photography props for babies — suggested anchor text: "non-toxic baby photo props"
- Creating a family photo timeline: milestones to document from birth to age 12 — suggested anchor text: "childhood photo milestone checklist"
- Digital photo organization for parents: cloud backups, privacy settings, and printable albums — suggested anchor text: "secure family photo storage"
- Screen time balance: how much photo reviewing is healthy for kids ages 3–10? — suggested anchor text: "healthy photo-sharing habits with kids"
- Photographing neurodivergent children: sensory-friendly techniques and respectful framing — suggested anchor text: "inclusive kid photography tips"
Your Next Step Isn’t Better Gear — It’s Better Presence
How to photograph kids isn’t about technical mastery. It’s about slowing down enough to notice the way light catches their eyelashes mid-yawn, the determined set of their jaw while stacking blocks, or the quiet pride in handing you their scribbled drawing. It’s about honoring their autonomy while preserving fleeting magic. So this week, put your camera down for five minutes — just watch. Then pick it up again, kneel to their level, and capture what you saw *before* you reached for the shutter. Your most powerful tool isn’t in your hands. It’s in your attention. Ready to start? Download our free Developmental Photo Checklist — designed with pediatric OTs and family photographers to help you spot and celebrate growth, not just grin.
More Articles
 When Can Kids Sit in Front Seat Virginia? (2026)
 What Is a Pronoun for Kids? Simple, Play-Based Tips
 Sugar and Kids’ Hyperactivity: What Research Shows (2026)
 How to Prepare Kids for School: A Science-Backed Guide
 Does Rauw Alejandro Have a Kid? (2026)
 Why Can’t Kids Drink Coffee? Risks & Safe Alternatives
 How Many Kids Have Gone Missing
 Kids in Hot Tubs: AAP Safety Checklist (2026)
 Gaza Children’s Trauma: Evidence-Based Protection (2026)
 Does Adam Levine Have Kids? Family, Fame & Fatherhood